Staying organized (and sane!) this holiday season!
Tips and Tricks from a Professional Organizer What is Functional Spaces? The 2020 holiday season is here at last! A bright and glittering spot in...

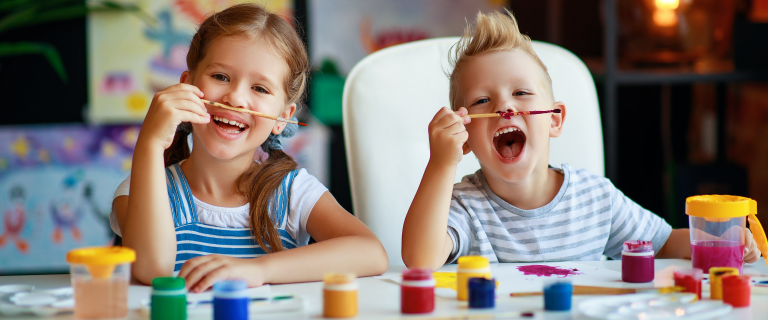
There’s no doubt about it - we’ve all been stuck at home a lot lately. For kids, especially, this has been challenging. They like to stay busy. So, being kept home from school and away from their friends because of the COVID-19 pandemic has been tough. It’s been tough for parents too. Let’s face it, coming up with a different activity every day is no easy task. So, to help you out, we’ve put together some fun and easy craft ideas for kids at home.
The best part about these crafts is that all you’ll need is some simple supplies that can be found at your local thrift store.
Why not make a day of it - strap on the shoes, load everyone into the car and head down to a Goodwill Alberta thrift store to pick out your supplies. It’s sure to be a fun-filled day (and a nice break for you too)!
Need a costume while you're at it? Check out these awesome thrift store costume ideas and pick up a costume while you're visiting Goodwill.
Ready to start?
Here are our four favourite craft ideas for kids.

This craft will take you back to your own childhood. And, with tie-dye all the rage in fashion right now, why not jump on the trend!
Here’s what you’ll need:
Start at your local thrift store. Head to the children’s clothing section to pick out some items to dye. There you’ll find lots to choose from - t-shirts, hoodies, socks, all of these options will be fun for your kids to create in tie-dye colours.
For everything else (i.e. the actual dye and rubber bands), make a quick stop at your local craft store, Michaels or Walmart.
Look for a one-step tie-dye kit to eliminate the additional step of soaking your clothing items in soda ash. There are many one-step kits on the market that come with easy to use dye. This will make the craft much simpler and more fun, especially for younger children.
With your one-step tie-dye kit, all you’ll need to do is tie up your clothing items with rubber bands and start applying the dye!
Be sure to follow all of the instructions provided in the kit and to use protective gloves.

Craft ideas for kids that let them make something they can use in the future is always more rewarding. This craft idea lets them create their very own mug to use at home.
You’ll need:
Mugs are easy to find at Goodwill. Just visit the home section and you’re sure to find what you’re looking for.
As for the disposable container - you’ll be using this to marble your mugs so you’ll want to use something that can be thrown away. You likely already have something perfect at home. A margarine container or an old Ziplock Tupperware will work perfectly! If you don’t have something suitable, there will be lots to choose from at the thrift shop.
The same goes for the nail polish - you might already have some at home that you can use. Just be sure to stay away from quick-dry nail polish, as this doesn’t usually work very well.
To start, you’ll want to fill your disposable container with hot water. The hotter the better, keeping in mind the little hands that will be near it!
Next, hold the nail polish bottle near the top of the water and slowly apply a few drops (you might want to help your kids with this step, as you’ll want to make sure that the polish is applied gently enough that it sits on top of the water).
Once the drops are floating on the water, swirl them around with a toothpick.
Finally, dip the mug in the water! The nail polish will stick in a cool marble design.
Place the decorated mugs aside to dry. Ideally, you’ll want to leave them overnight before you use them.
Your kids can get creative with this one - try mixing different nail polish colours in the water and see what you come up with!

Another fun and easy crafting idea for kids is to create plant pots from used cups, mugs or pots.
What’s even better - your kids can use these hand-painted pots to grow their own plants! It’s like having a pet (but better) - plant it, name it, water it, watch it grow!
Here’s what you’ll need:
Head to the home and garden section of your local thrift store. There you’ll be able to find mugs, cups, and pots of all sizes. Pick your favourite size and shape and you’re ready to get started.
Visit your local craft store to pick up some paint. Just be sure that the paint you purchase is appropriate for the material that your pot or cup is made from.
If you want to put some plants in your kid’s DIY pots once they’re done, be sure to stop by the nursery for some plants and soil!
Once you have everything you need, set up an area where your kids can paint (ideally covered in garbage bags for an easy clean up) and let the fun begin.
After your kids are done painting, let the new pots dry before you fill them with soil and plant your new plants.

From drawing to playing games (think charades), a chalkboard can be fun for the whole family. Better yet, a chalkboard is easy to make at home! It’s not often that craft ideas for kids result in something that will provide hours of fun, even after it’s complete. So, this craft is a go-to!
You’ll need:
You’ll find a selection of picture frames at your local Goodwill thrift store. Let your kids pick the size and shape they like the most. However, make sure the picture frame is made of glass.
Remove the glass from the frame. Clean it with a glass cleaner. After allowing time to dry, paint (or spray) it with a primer made for glass.
Note: The edges of the glass may be sharp. Therefore, you’ll want to be the one to remove the glass and clean it. Consider using protection on your hands to keep yourself from being cut.
Once the primer is dry, the fun can begin.
Paint the picture frame with fun designs and colours.
Note: Be sure to use paint that will stick to the frame.
After designing and painting the frame, paint the primed glass with chalkboard paint.
Parents - if your kids are young, you may want to do this while they paint the frame. The glass can be sharp so you’ll want to make sure they don’t touch the edges while painting.
You’ll need two coats. For the first, paint a thin coat, using brush strokes that go in one direction. For the second coat, use brush strokes in the opposite direction. Make sure to let the first coat dry completely before applying the second.
There you have it! Four fun and easy craft ideas for kids at home! And, with these crafts, you’ll be creating something that will provide hours of fun after the fact!
Want to order donated clothes, mugs, cups and other crafting materials online or see what your local thrift store has in-store before you visit?
Looking for more goods and even bigger savings? Check out Goodwill's Impact Center for clothing, furniture and other goods ideal for crafts and upcycling.
Tips and Tricks from a Professional Organizer What is Functional Spaces? The 2020 holiday season is here at last! A bright and glittering spot in...
I love the drama of a summer storm—the thrill of thunder and ever-exciting lightning add interest to dreary weather. But after a few rainy days...